As you may know, normal mapping is a nifty way of rendering a detailed surface, without the need to use an insane ammount of triangles. Since the light rendering we described in a previous post felt like a modest success, we decided to experiment with implementing normal mapping, and of course see if we could make it work in synergy with our existing light shaders. In this post, we briefly describe the theory and our implementation of this nice rendering technique.
So, normal mapping works by modifying the normal for each point on an object, and thus the light will shade as if the surface in that point was tilted. To do this, we will use a texture (the normal map) containing modified normals for the object, in tangent space.
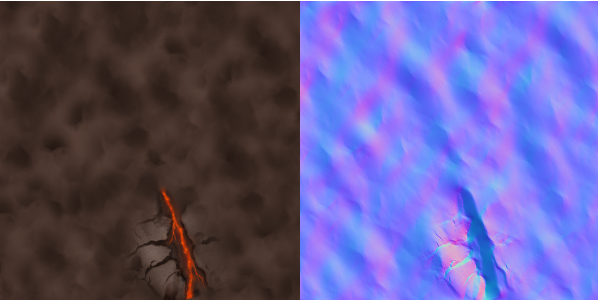
Below we see the color texture, as well as the normal map texture, for our island.

To be able to extract the normals from the texture, and convert them to view space (in which we calculate our lighting) we will not only need the normal, but also the tangent and the binormal. Although the math to calculate these vectors from a simple mesh is not very complicated, we struggled quite a bit with how to do this for an arbirtrary mesh. Luckily, there are almost always people who have already done what you try to do, so we decided to take a shortcut by using an obj-loader created by the very talented Stefan Wagner (http://bompoblog.tumblr.com/). This object loader provides us with a libgdx mesh including the additional tangents and binormals (however, we don’t pass the binormals to the shader since we can calculate it with a simple cross product).
Now, in the fragment shader, we need to create three basis vectors. These will be used with the normal we extract from the normal map, to transform it to view space in the following way:
vec3 n = normalize(viewSpaceNormal);
vec3 t = normalize(viewSpaceTangent);
vec3 b = normalize(cross(n, t));
mat3 basis = mat3(t, b, n);
vec3 tangentSpaceNormal = texture2D(normalMap, v_texCoord).xyz * 2.0 - 1.0;
vec3 N = basis * tangentSpaceNormal;
The vector N can now be used as the normal to calculate the lighting as usual.
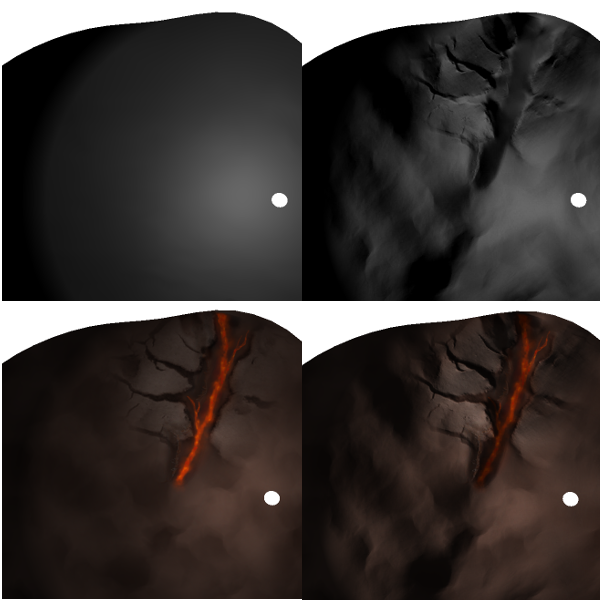
A downloadable apk-demo of our normal mapping combined with the tiled forward shading will be available soon. It is hard to appreciate the effects of normal mapping from an image, but we have tried our best to give you a feel of what is going on with the image below.
Top left: no texture and standard shading, Top right: no texture and normal mapping,
Bottom left: texure and standard shading, Bottom right: texture and normal mapping.

We realise that this is a very brief explanation of normal mapping, and if you want to implement it, feel free to dig through our source code or have a look at chapter 8 in the book Iphone 3D Programming (http://ofps.oreilly.com/titles/9780596804824/chadvanced.html) which helped us alot. Of course, we appreciate any comments, tips, or questions! See ya next time!
Update: We added a video of the demo.